Magento Selling clothing (or another product with options) without having Magento keep track of stock

Some products have a number of options that are important for the customer to select.
Here I show how to make a product with options (color and size) where Magento only sees one product – so it won’t it will not be possible to see how many large in red you have from Magento.

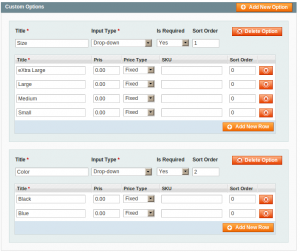
When you create a product in the admin panel there is a label Custom Options.


Use “Add new option” to make the option (color, size or whatnot)
Then for each of the options use add new row to add the deferent values that the option can have.
The column labeled price is for adding a extra cost for a option (if for instance the red shirt should be more expensive).

Then this will look something like this in the store

Then only down sides I have seen with this is that I have to add the options one time for each of the products (but that is also nice since not all products have the same values) and that Magento will treat this as one single product so I can’t let Magento manage the stock for this/these products.

Magento redirect

Sometimes there is a need to do a redirect from inside a Magento page where you might not know if headers are sent or not – Or maybe you wish to make a new redirect function where you don’t have to worry about writing different code if the headers are sent or not.

This is a way to do a redirect where a javascript redirect is used if headers have been sent (and thus it is no longer possible to use a header redirect)

if (!headers_sent()) {
 
	Mage::app()->getResponse()->setRedirect(Mage::getBaseUrl() . 'portal/');
 
}
 
else {
 
	$baseUrl = Mage::getBaseUrl() . 'portal/';
 
	print '<script type="text/javascript">';
 
	print "window.location.href = '{$baseUrl}';";
 
	print '</script>';
 
}

And the function headers_sent() is a php function so that can of course be used outside of Magento in any php scrip where a header location is nice but not always possible.

OpenX INSERT_RANDOM_NUMBER_HERE example in php

For iframe’s and noscript tags OpenX uses a random string in the image in order to prevent user caching of banners (as that would mean less impressions and possibly outdated ads).
However these tags needs to be added by the user.
An example way to make these random numbers using PHP would be to use

<?php echo rand();?>

So an complete example invocation code would be

<a href="http://www.example.com/ck.php?n=3798N2&cb=<?php echo rand();?>" _fcksavedurl="http://www.example.com/ck.php?n=3798N2&cb=<?php echo rand();?>" _fcksavedurl="http://www.example.com/ck.php?n=3798N2&cb=<?php echo rand();?>" 
<img src="http://www.example.com/avw.php?zoneid=10&n=3798N2&cb=<?php echo rand(); ?>"></a>

Magento: Problem uploading images

When I was truing to upload images to products in the Magento admin panel I got the following error:
SSL Error: Invalid or self-signed certificate while uploading image from backend

The way I solved this issue was by setting the timezone on the computer that I was uploading from to the same timezone as the settings in Magento.

Other suggestions to try out if that don’t work:

  • If you are using certificate: Verify that it is valid, you have correct domains etc
  • Set use secure url in admin to false

Magento: Redirecting from inside a view

To redirect before headers are started to be sent (for instance from inside a controller) the following works:

Mage::app()->getFrontController()->getResponse()->setRedirect(Mage::getUrl('portal'));

This will redirect to the page called portal.

However if you try to do this from a view then you will get an error message about headers already having been sent.
If you need to do a redirect form inside a view then using javascript is one way to do this:

echo 'Due to SOMEREASON you are being redirected <a herf="' . Mage::getUrl('portal') . '">Please click here if nothing happens</a>';
		echo '<script type="text/javascript">
		<!--
		window.location = "' . Mage::getUrl('portal') . '"
		//-->
		</script>';

However a tip is to reconsider if you really need to do the redirect from the view, doing it from the controller is a lot easier and quicker.

Magento: Loading a store by store_id

Sometimes there is a need to load a store from the store id, this is not hard to do once you find the right function.

Mage::getModel('core/store')->load($storeId); //a store object

A store object might look like this. Each of the data has a get and a set fucntion (so getIsActive() returns if the store is active or not)


Mage_Core_Model_Store Object
(
    [_cacheTag:protected] => 1
    [_eventPrefix:protected] => store
    [_eventObject:protected] => store
    [_priceFilter:protected] => 
    [_website:protected] => 
    [_group:protected] => 
    [_configCache:protected] => 
    [_configCacheBaseNodes:protected] => Array
        (
            [0] => catalog/price/scope
            [1] => web/secure/base_url
            [2] => web/secure/use_in_adminhtml
            [3] => web/secure/use_in_frontend
            [4] => web/url/use_store
            [5] => web/unsecure/base_url
            [6] => web/seo/use_rewrites
            [7] => web/unsecure/base_link_url
            [8] => web/secure/base_link_url
            [9] => general/locale/code
        )
 
    [_dirCache:protected] => Array()
 
    [_urlCache:protected] => Array()
 
    [_baseUrlCache:protected] => Array()
 
    [_session:protected] => 
    [_isAdminSecure:protected] => 
    [_isFrontSecure:protected] => 
    [_isReadOnly:private] => 
    [_resourceName:protected] => core/store
    [_resource:protected] => 
    [_resourceCollectionName:protected] => core/store_collection
    [_dataSaveAllowed:protected] => 1
    [_data:protected] => Array
        (
            [store_id] => 64
            [code] => mystore
            [website_id] => 1
            [group_id] => 25
            [name] => mystore
            [sort_order] => 0
            [is_active] => 1
        )
 
    [_origData:protected] => Array
        (
            [store_id] => 64
            [code] => mystore
            [website_id] => 1
            [group_id] => 25
            [name] => mystore
            [sort_order] => 0
            [is_active] => 1
        )
 
    [_idFieldName:protected] => 
    [_isDeleted:protected] => 
)

An an example code to find if the store with id 5 is active or not

if (Mage::getModel('core/store')->load($storeId)->getIsActive())
    //do something if we are active
else
    //do something else if the store is not active

Executing rsync as sudo

A quick way to run rsync (via sudo on the remote server) is to use the –rsync-path option (asuming that sudo is configured to run without a password) also verify that you have !tty_tickets in your sudoers file.

rsync -avz --rsync-path='sudo rsync' user@server:/dir/to/backup /destination/directory/

To do this interactivly (without being able to do it password less)

user@bacup$ stty -echo;ssh user@server sudo -v; stty echo
user@bacup$ rsync -avz --rsync-path='sudo rsync' user@server:/dir/to/backup /destination/directory/

(Or as one line)

stty -echo; rsync -azv --rsync-path='sudo rsync' user@server:/dir/to/backup /destination/directory/; stty echo

“stty -echo” turns off input echo (so that your password will not be shown as you type it)
“stty echo” turns the input echo back on (so you can see what you are doing)

Creating sitemap(s) in magento

A sitemap is a xml file that is used by (for instance) search engines to get a better overview of your site. It gives details about what pages exists and how ranks the pages towards themselves.
Despite the name the sitemap is not Google specific, it can be used for any search engine, or any other reason that you need a sitemap.

Create a folder for the site map and make it writable

First figure out where to place the sitemap(s) and make that location writable by the webserver.
In a Linux environment this is done from the console this is done like:

mkdir sitemap
sudo chown admin:www-data sitemap
sudo chmod 775 sitemap
touch sitemap/index.php

The touch index.php will create a empty index file (that keeps the folder from being listed.

Define a sitemap

In the admin panel go to “Catalog->Goolge Sitemap->Add sitemap”

Fill out this form with values that makes sense to you.
Note: If you have sveral stores one website, then all product that are visible on that website is added to the sitemap.

Make the site map update automatically

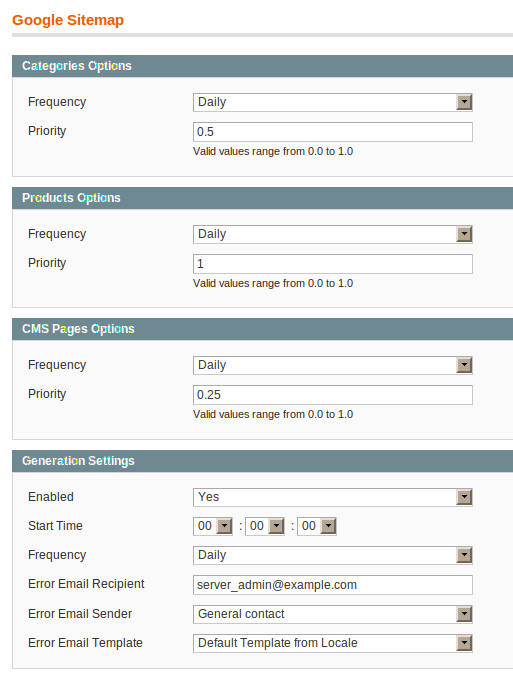
In the admin pangel go to “System->Configuration->Google sitemap”

As always, change to values that makes sense to you

Another (older) way of doing this is described by the guys at inchoo

Mediawiki turning on interwiki imports

If you wish to import data from another wiki running MediaWiki or for that matter from one or several wiki’s on wikipedia then there is a quick way to import page by page.

This functionality is in MediaWiki by default, but needs to be initiated. This is done by adding the following in LocalSettings.php

$wgImportSources = array(
      'wikinews',
      'wikiquote',
      'wikipedia',
);

The ImportSources are interwiki links from the database.

sudo: cd: command not found

If you try to use sudo to get to a directory (for instance if the user calling sudo don’t have permissions for that folder) then you will see an error message like this

user@server:~$ sudo cd /var/log/
sudo: cd: command not found

While I don’t know how to get sudo to work with cd I can offer some workarounds.
As far as I can tell the problem with sudo cd is that if it would have worked the user would be in a directory that he/she has no permissions to so nothing is gained and having a folder that the user don’t have permissions to as the working directory might cause problems in more way than one.

  • Use “sudo ls” and then continue with the next command as sudo without entering that folder; for instance
      sudo ls /var/log
    sudo cat /var/log/syslog
  • Open a shell using sudo:
     sudo -s

    this will give you a shell with su permissions

  • simulate initial login using sudo:
     sudo -i

    this will also give you su permissions but with the difference that it will be like logging in like root (home dir, profile, variables etc) [this would be equivalent of running “sudo su”]

  • Use sudo to start a new shell and do all you need to do in this shell
     sudo sh -c 'cd /var/spool/exim4/;ls'

    (don’t miss the single quotes in the command)

To give some more details on the difference between -i and -s here is a excerpt from the man pages

-i [command]
The -i (simulate initial login) option runs the shell specified in the passwd(5) entry of the target user as a login shell. This means that login-specific resource files such as .profile or .login will be read by the shell. If a command is specified, it is passed to the shell for execution. Otherwise, an interactive shell is executed. sudo attempts to change to that user’s home directory before running the shell. It also initializes the environment, leaving DISPLAY and TERM unchanged, setting HOME, SHELL, USER, LOGNAME, and PATH, as well as the contents of /etc/environment on Linux and AIX systems. All other environment variables are removed.
-s [command]
The -s (shell) option runs the shell specified by the SHELL environment variable if it is set or the shell as specified in passwd(5). If a command is specified, it is passed to the shell for execution. Otherwise, an interactive shell is executed.